
Squid is an open source proxy tool for your servers, you can set it up for caching server or you can make it as a firewall to allow or block certain websites. But it can also be used as kind of VPN to route all your phone’s or laptop’s request from that server. It can also be used to provide internet access to you machine which doesn’t have internet access directly. So lots of use cases, now lets get to the point.
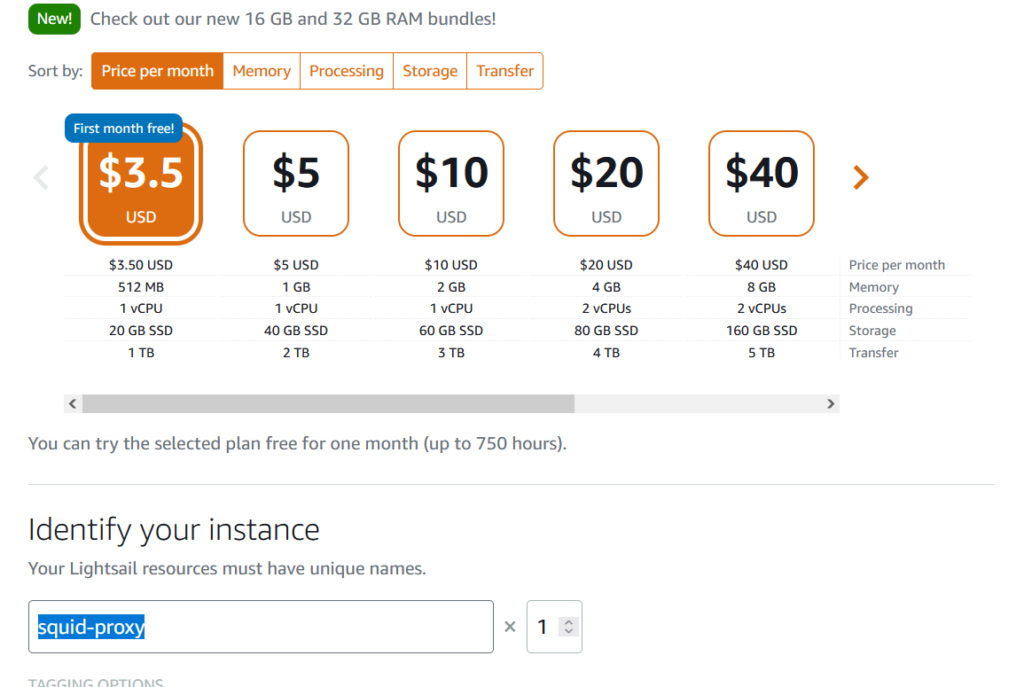
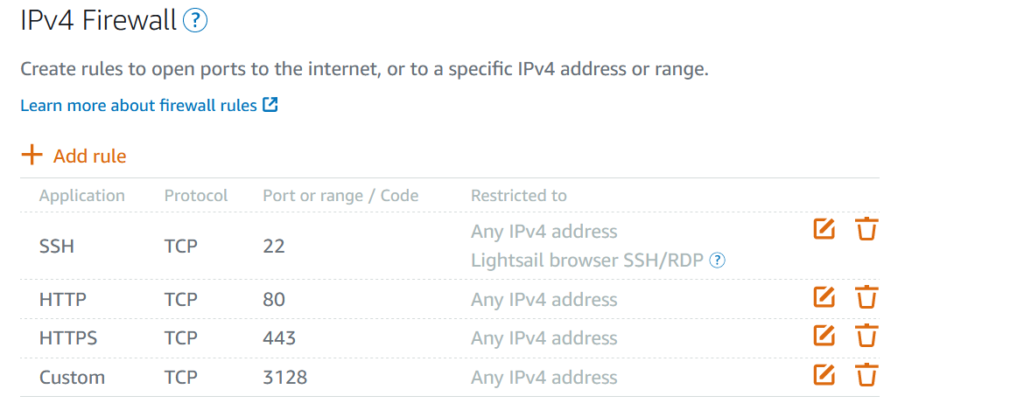
Step.1. Create your VPS server and allow 3128 port to your ip address or to allow it to all ip address by going to your vps provider. I have used AWS lightsail in the example, you can use any VPS provider.
Go to its networking options and allow port HTTP, HTTPS and 3128.
Step 2. Launch terminal using ssh or browser ssh. and run the following commands
sudo apt update && sudo apt install squid -y
Step 3. Install Apache2-utils package for generating password file
sudo apt install apache2-utils -y
Step 4. Generate username and password file
sudo htpasswd -c /etc/squid/passwords YOUR_USERNAME
Replace YOUR_USERNAME with your username e.g admin.
Step 5. Configure squid config file to use it as authentication and block other requests
sudo nano /etc/squid/squid.conf
Search for “http_access allow” by using shortcut key ctrl+w and enter those keywords. Or you can search for line by typing (ctrl + shift + _ ) and enter line number 1418. to quickly go to the line. Remember if you enter ctrl+w on browser ssh console, it will close the connection as it closes the tab.
include /etc/squid/conf.d/*

#Example rule allowing access from your local networks.
#Adapt localnet in the ACL section to list your (internal) IP networks
# from where browsing should be allowed

 http_access allow localnet
 http_access allow localhost
Add the following lines below it
auth_param basic program /usr/lib/squid3/basic_ncsa_auth /etc/squid/passwords
auth_param basic realm proxy
acl authenticated proxy_auth REQUIRED
http_access allow authenticated

http_access deny all
Make sure to place auth_param before you deny all requests.
Step 6. Restart your squid server
sudo systemctl restart squid
To test your configuration go to firefox browser’s setting on your pc/mac and type proxy. Select manual configuration. Enter IP address, with port 3128 and hit save. After you save it just try to open any thing on the browser it will show a popup first time to enter username and password. After you entered it, you can test your ip address by typing it on google what is my ip. it will show ipv6 ip which means you are now connected to squid proxy.